Businesses often use a third-party finance and accounting software, such as Quickbooks, to process financial and transactional data for efficient accounting and financial due diligence. A firm’s financial data is mostly present in PDF documents such as invoices, receipts, bank statements, and purchase orders.
However, financial data in this form cannot be uploaded or imported directly into Quickbooks. Quickbooks only supports a few file formats for importing and uploading financial data such as Quicken (QFX), QuickBooks Online (QBO), Quickbook Supported CSV, or Microsoft Money (OFX).
In this blog, we will learn how to convert PDF documents to Quickbooks supported formats such as the QBO file format or a Quickbooks Supported CSV.
We will take a look at two methods of converting bank statements in PDF to QBO format.
Converting PDF to QBO via CSV.
In this method, we will first convert the bank statement from PDF to CSV, followed by a CSV to QBO (Quickbooks Supported CSV) conversion. Let’s go through the steps:
- Head over to the bank statement convertor from Nanonets by clicking here. It’s free to use and does not require a credit card. The page should look like the image below.
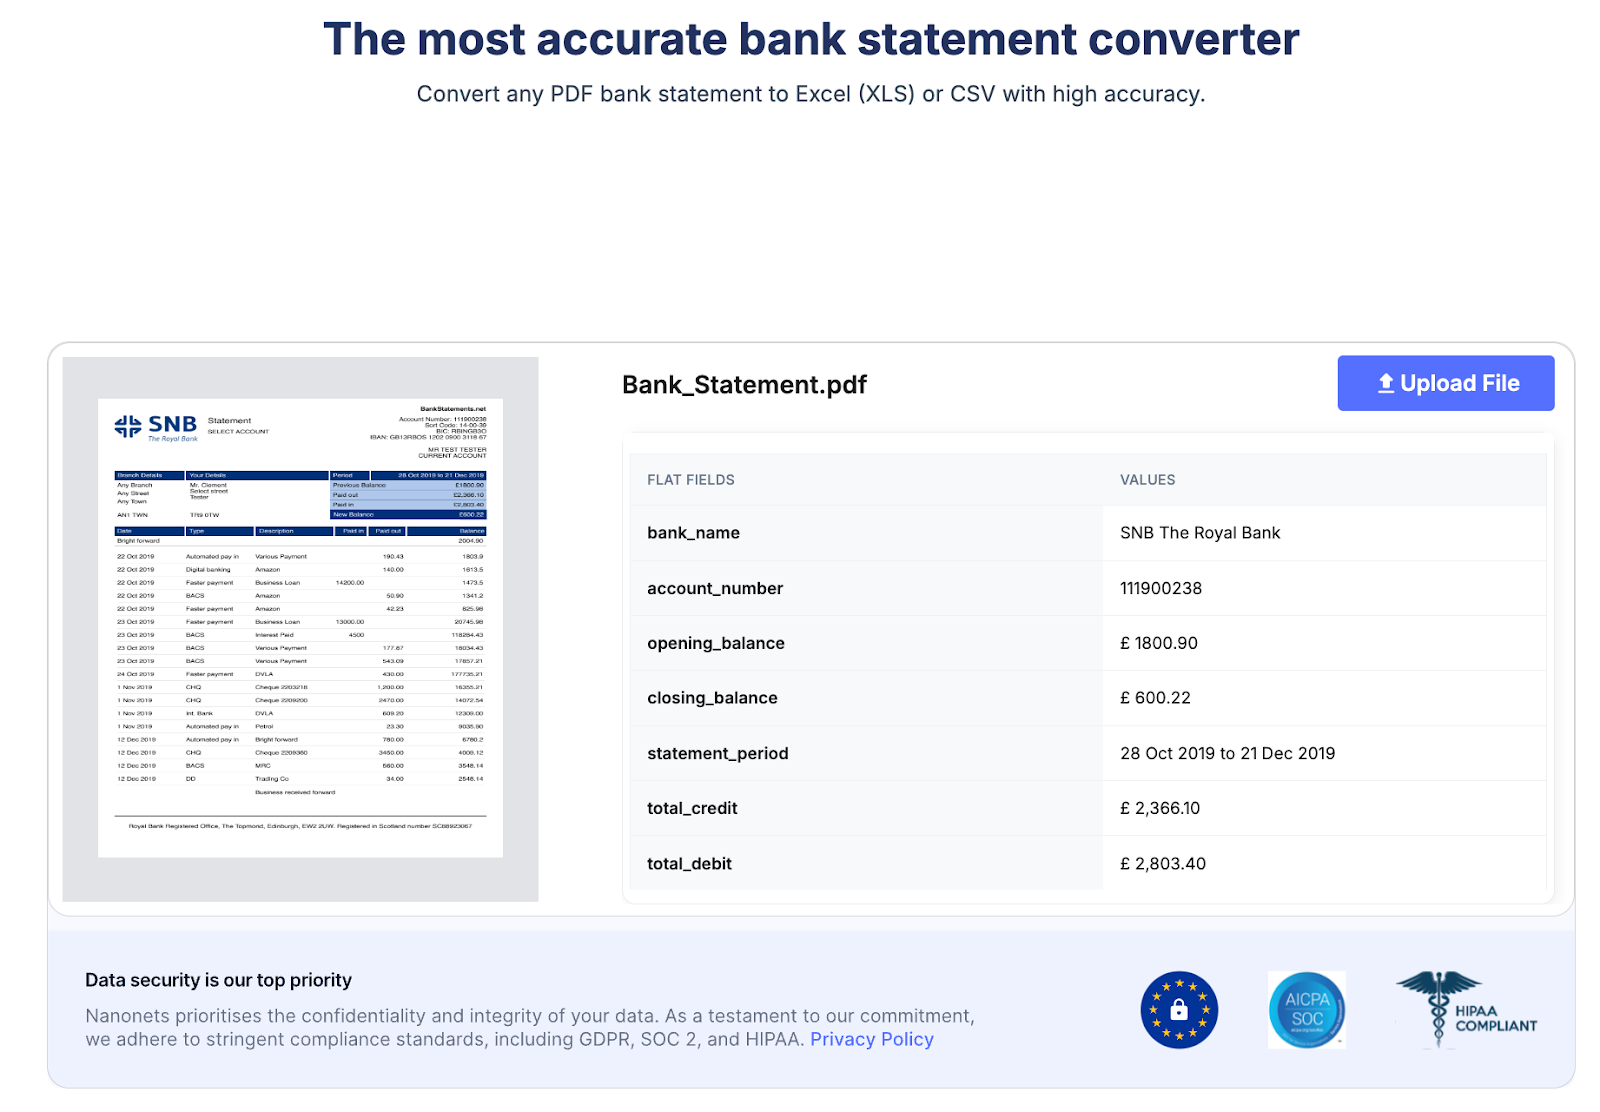
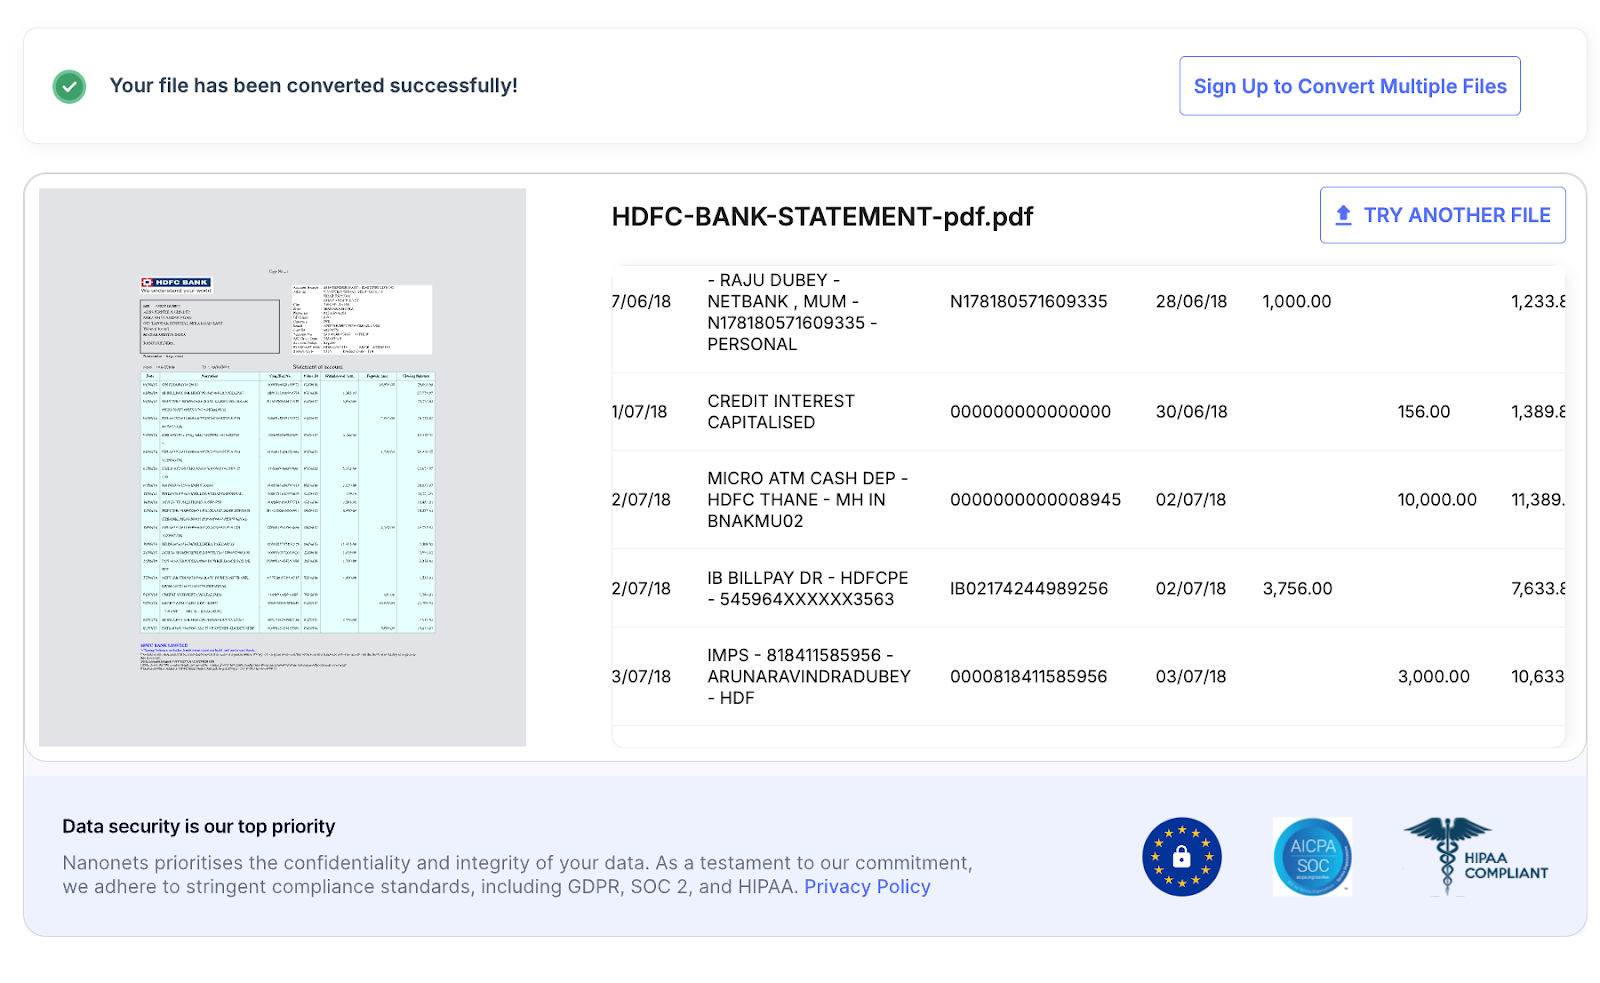
- The converter will display the extracted data from the bank statement. A download window will pop-up for downloading your bank statement in CSV format.
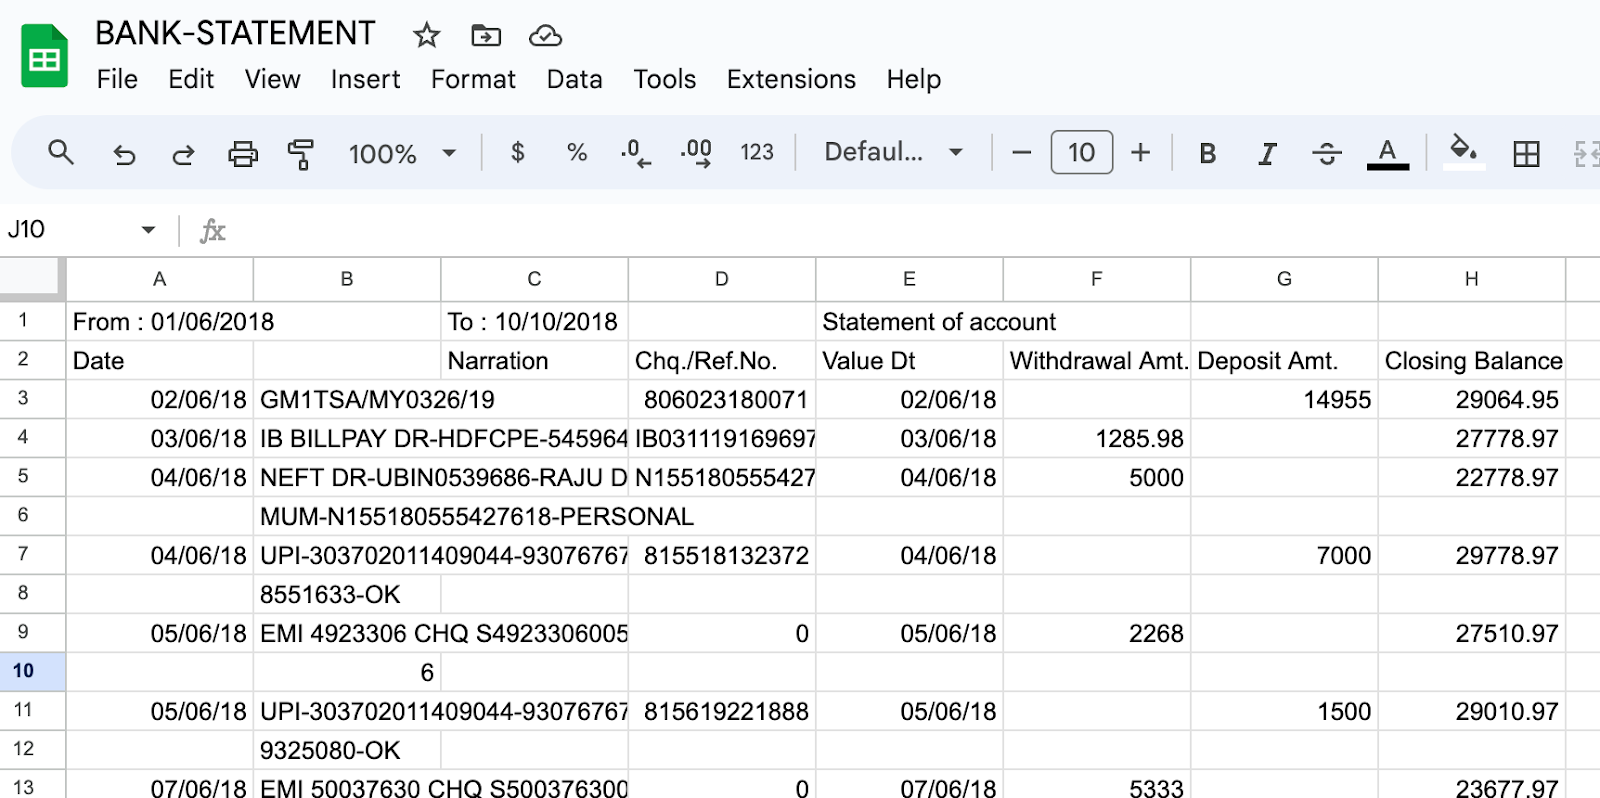
- Import your downloaded CSV file from Step 2 into Google Sheets by clicking on File->Import
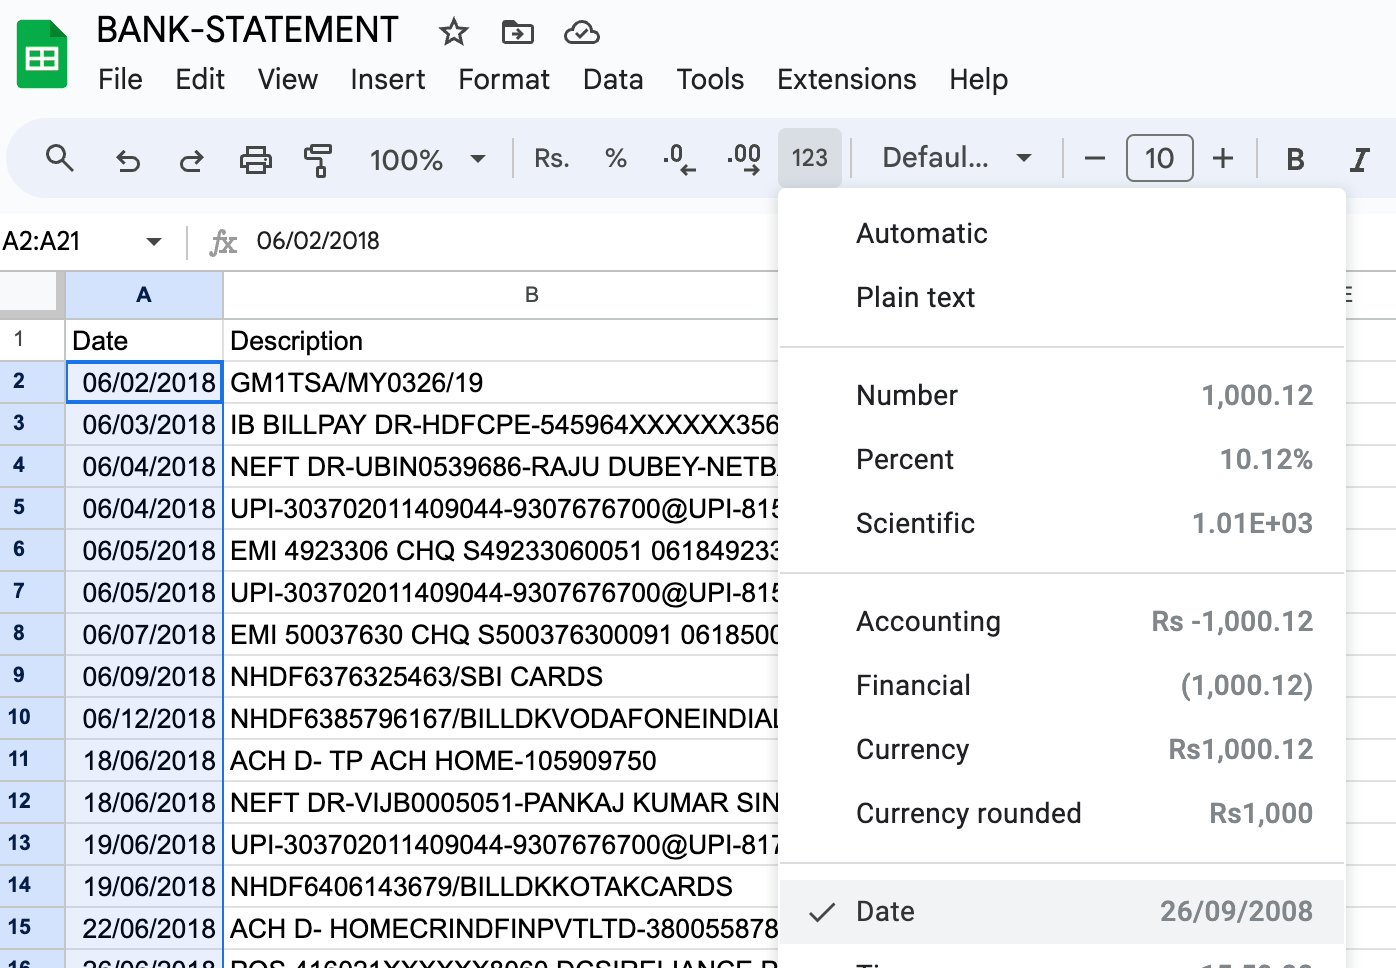
- The bank statement looks like the image below. Remove all additional text apart from the bank transaction table.
- Quickbooks supports CSV in only two formats. Hence, we will modify our CSV in one of the formats. Ensure that the column headers have the same name.
a. Three-column format: This has date, description, and amount.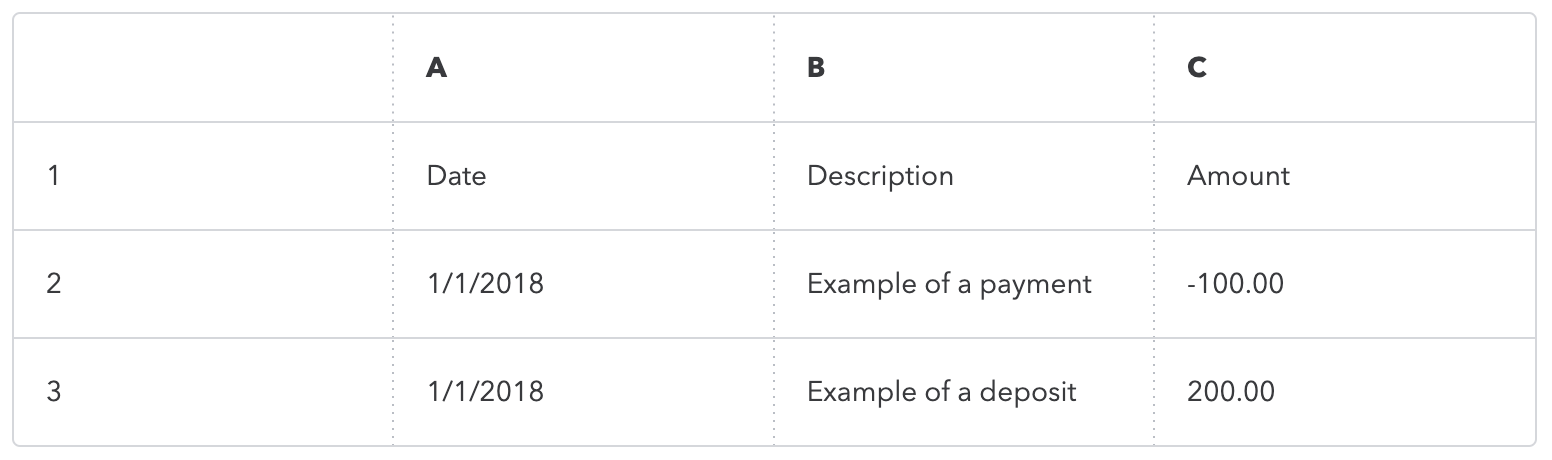
b. Four Column Format: This has date, description, credit, and debit.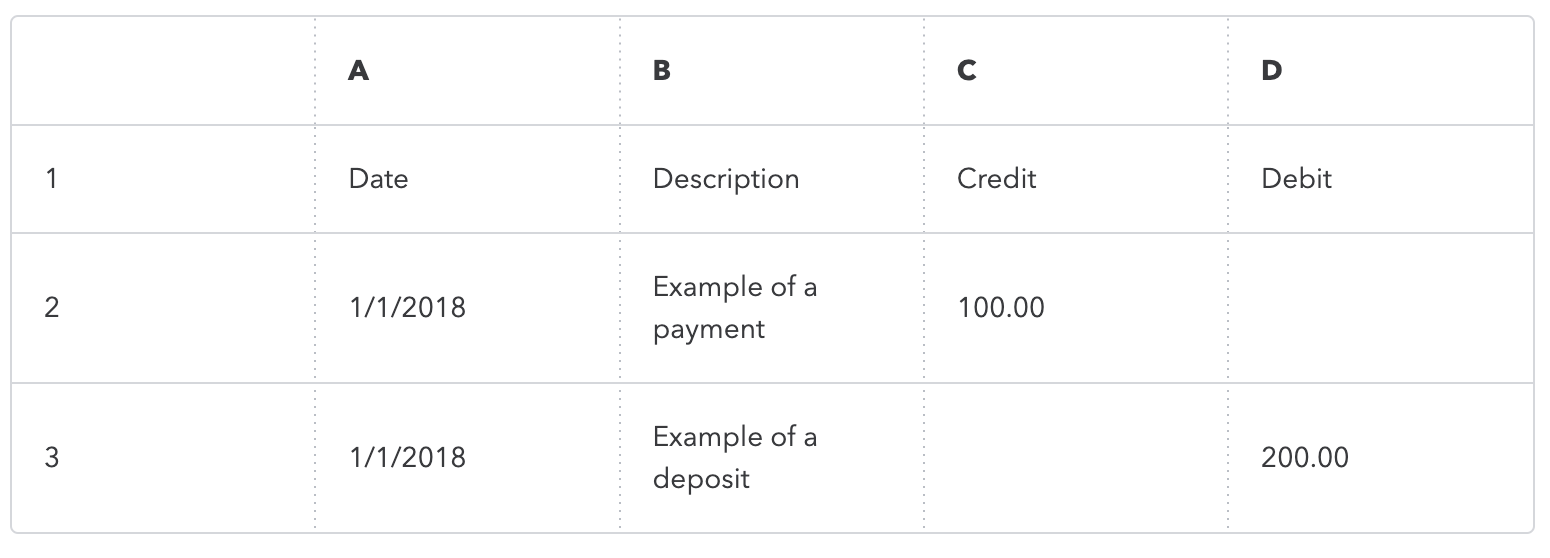
- Post modification, the sheet will look like this. We have removed additional columns and have named the headers in accordance with the QBO format.

- Modify the date column to ensure that it is in dd/mm/yyyy format. Select all the dates and click on More Formats (123 icon) -> Date dd/mm/yyyy format.
NOTE: If you do not see this option explicitly then click on More Formats (123 icon) -> Custom Date and Time. A window will open. Specify the date format as dd/mm/yyyy and click on Apply.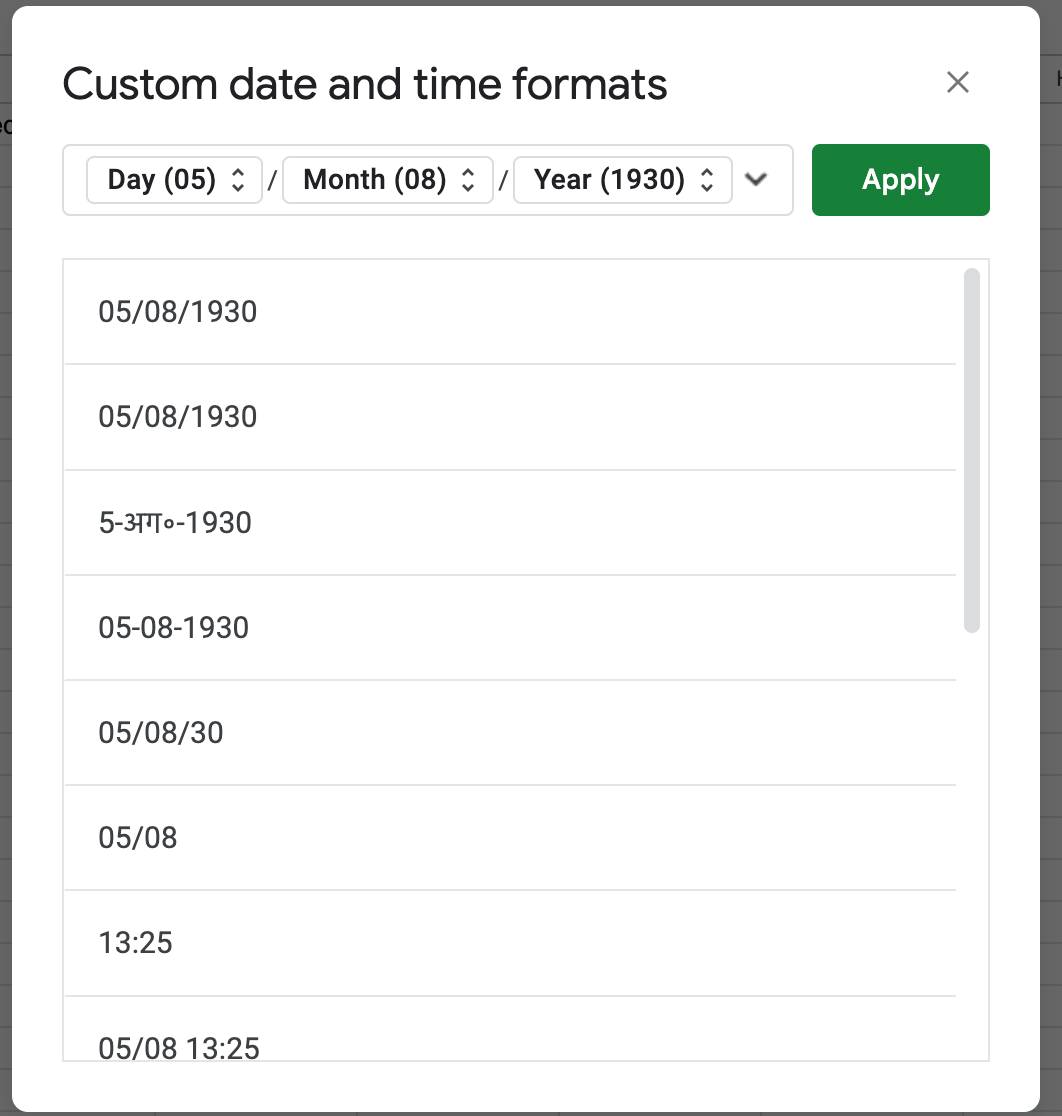
- The bank statement is now correctly formatted. Download it as CSV and upload on the Quickbooks platform
- If you see an error, ensure that you:
- Remove any zeros (0) from the file. Leave those cells blank.
- Correct any transactions that display numbers in the Description column
- Make sure the dates are in one format.
- Some banks add the day of the week in the Date column (for example, 20/11/2018 TUE). You need to remove the day of the week.

Using Nanonets’ PDF to QBO convertor
Well, that was a tough way of converting your bank statements in PDF to QBO. Moreover, the first method is not scalable as businesses generate several of these documents on a daily basis. Manually converting PDFs in this format is not the best utilization of human time and potential.
With Nanonets, we can efficiently extract data from bank statements in PDF format and automatically export it to Quickbooks. Let’s look at how to do this:
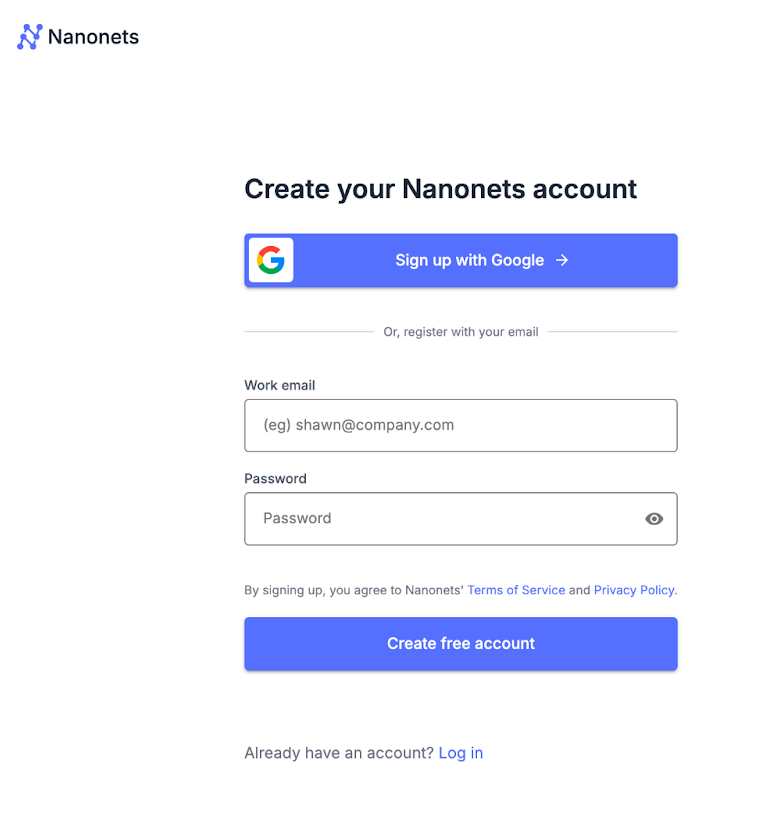
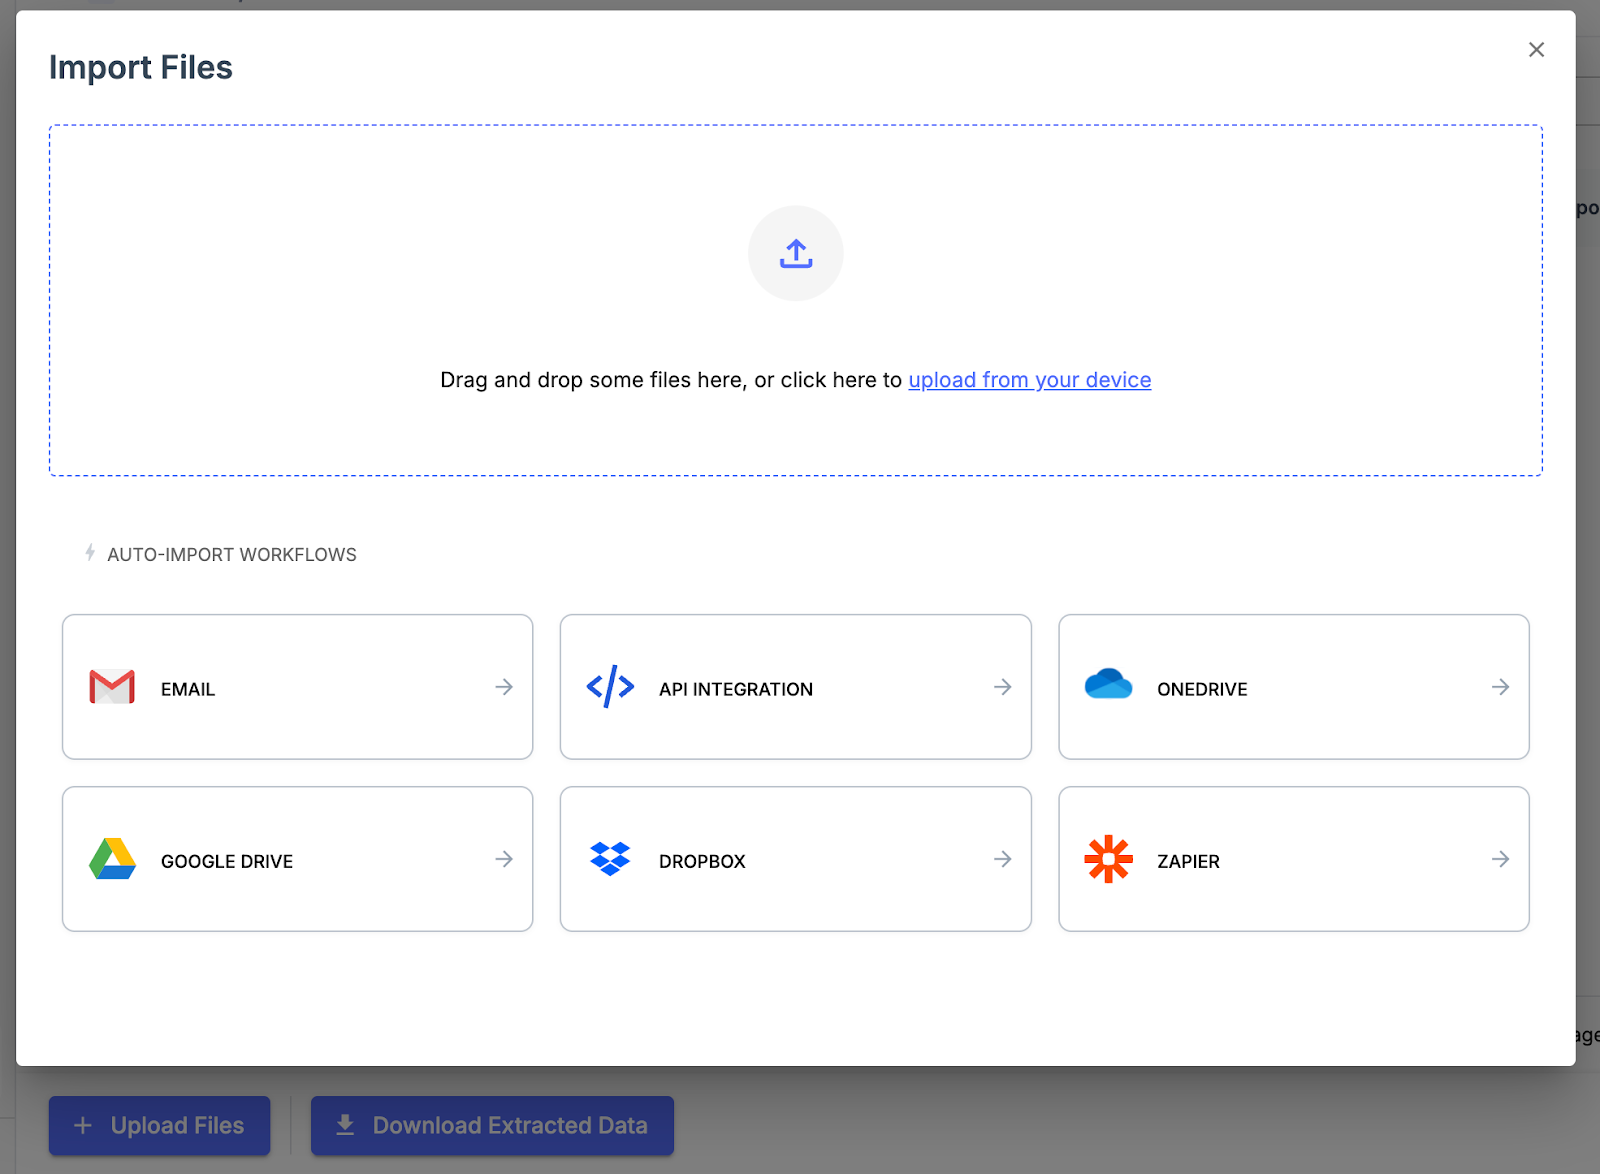
- Sign up for free on app.nanonets.com. No credit card is required.
- Click on New Workflow->Bank Statement. Your model will be created. Click on Upload to upload your bank statement in PDF format. You can also set up auto-forwarding via email to automatically upload your bank statements to Nanonets.
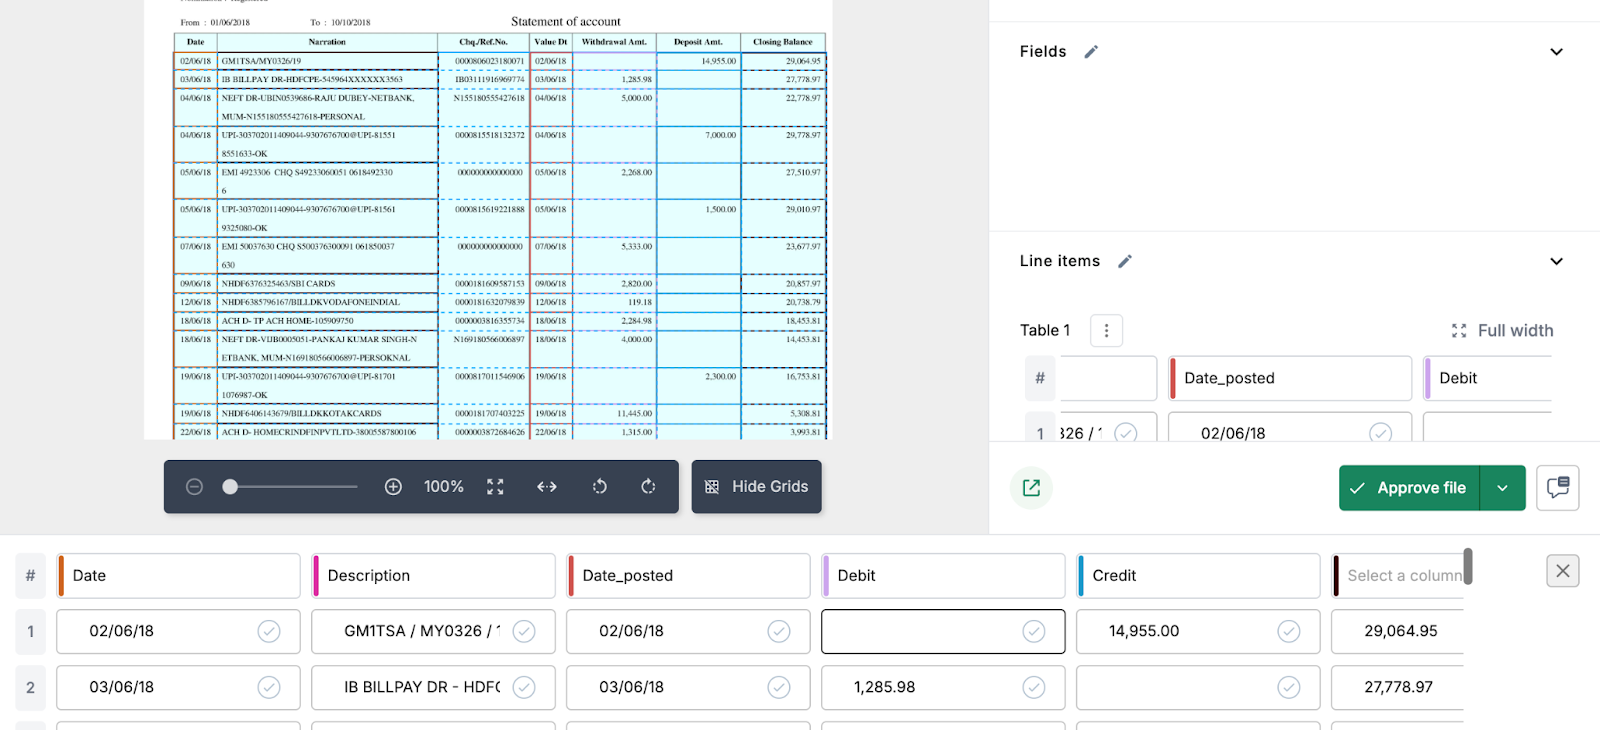
- Nanonets’ powerful OCR extracts the data from bank statements.
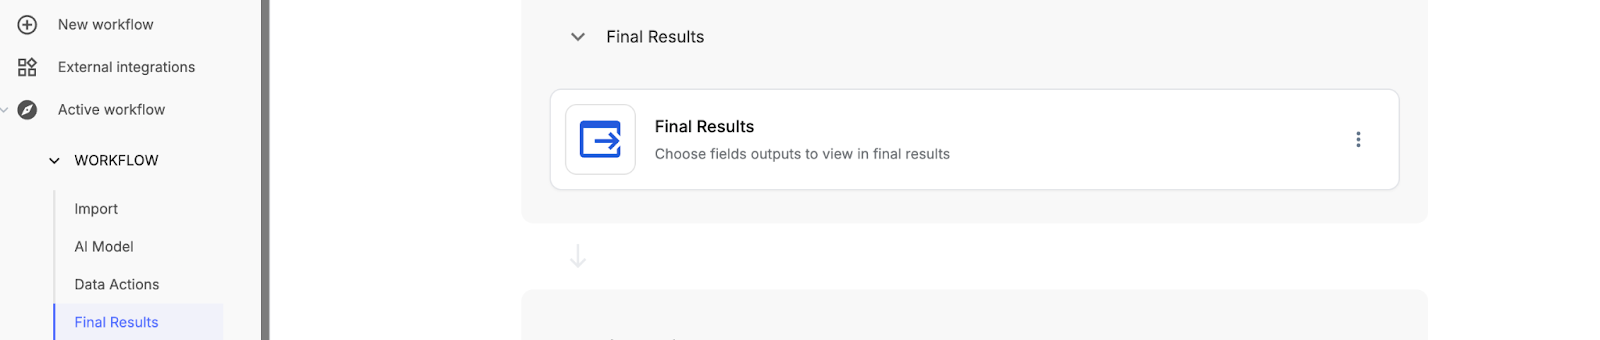
- Click on Back->Workflow->Final Results to select the fields to export to Quickbooks.
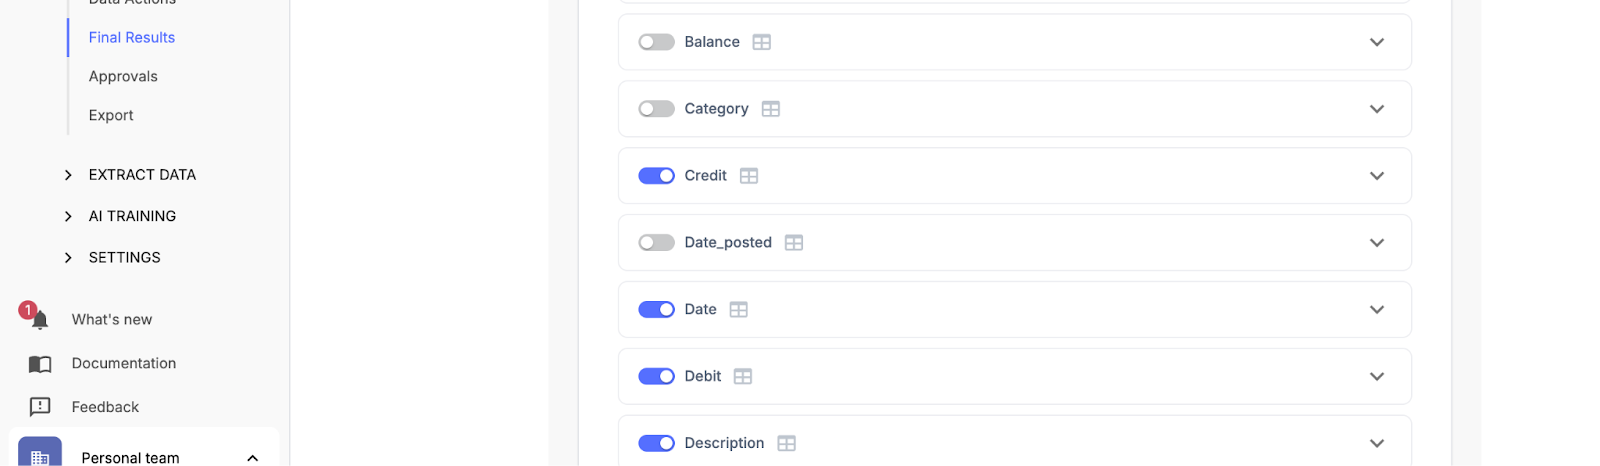
- Select Date, Description, Debit, and Credit fields from the Final Results.
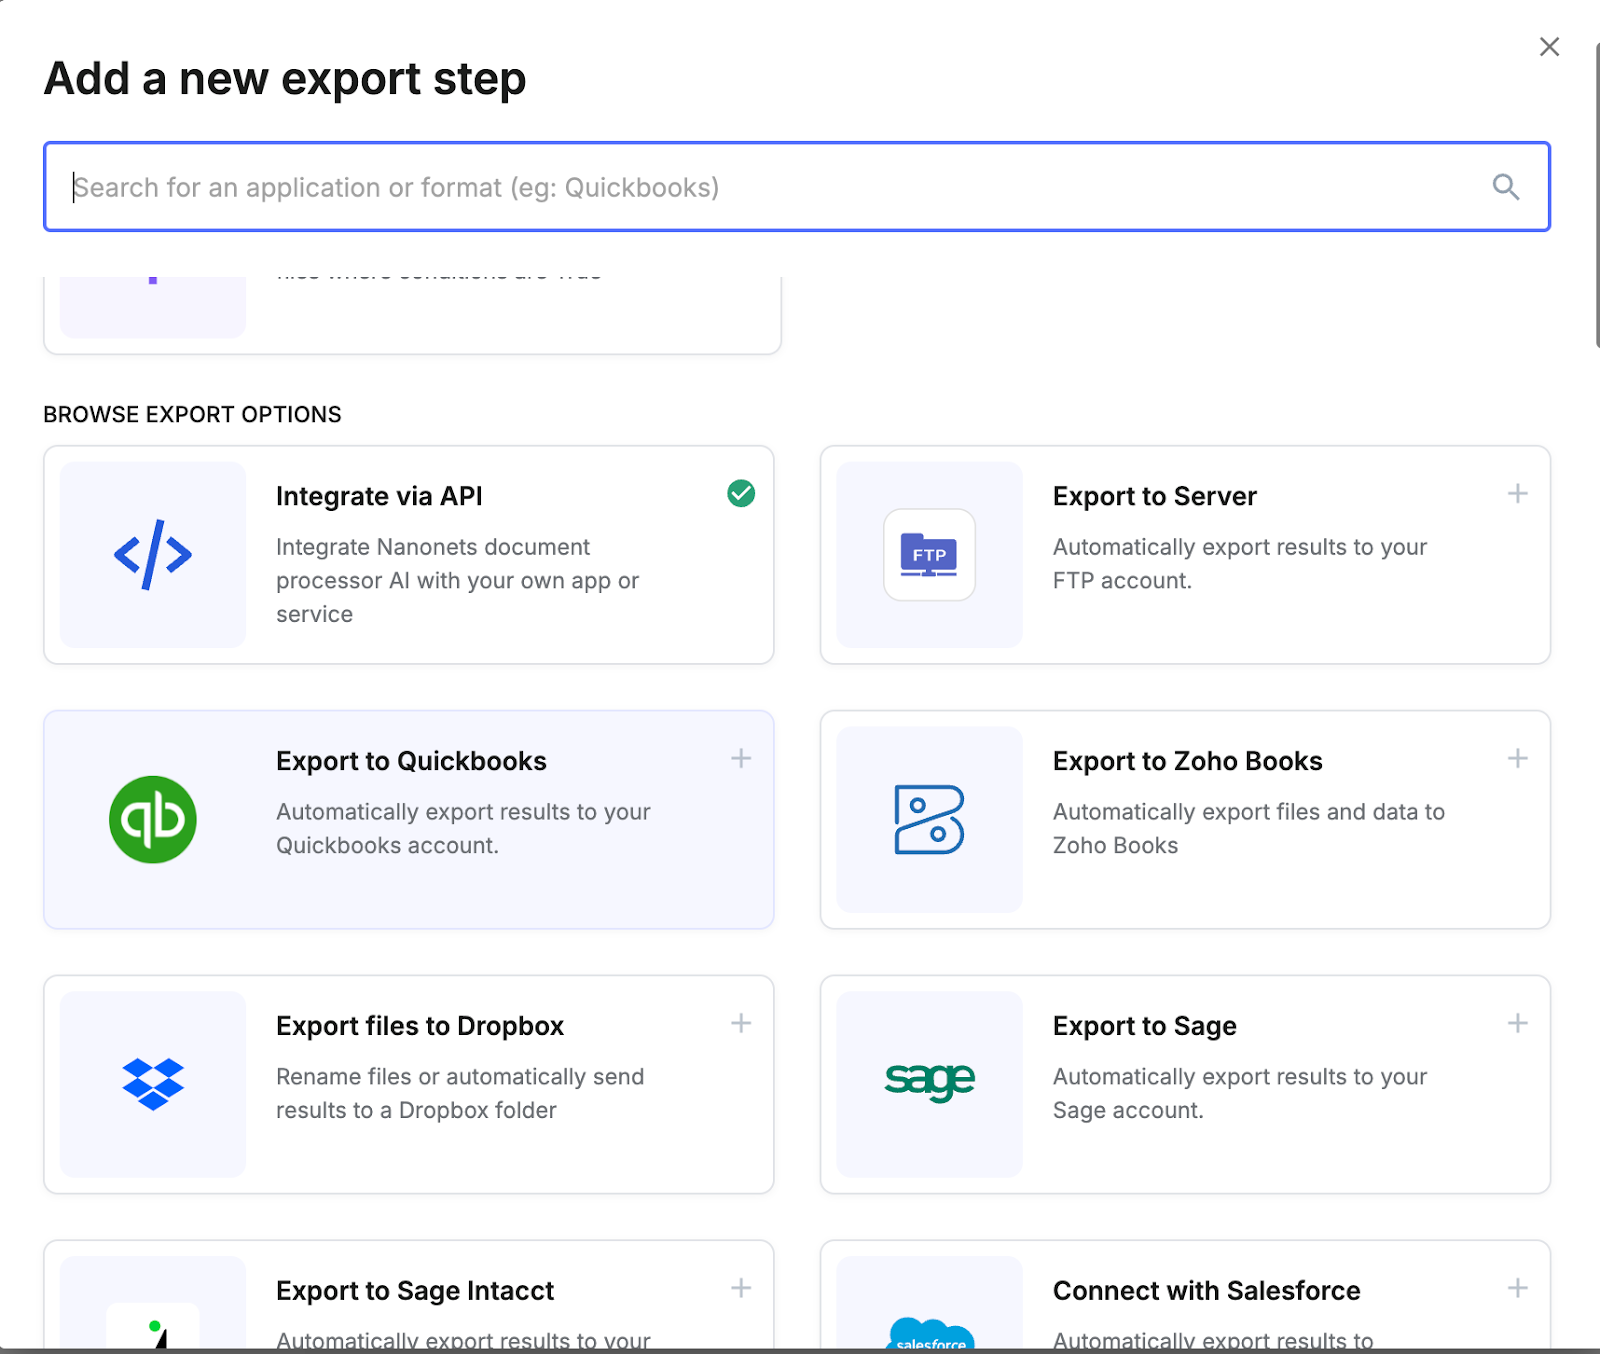
- Go to the Export section and click on Browse all export options. Select Quickbooks from the window.
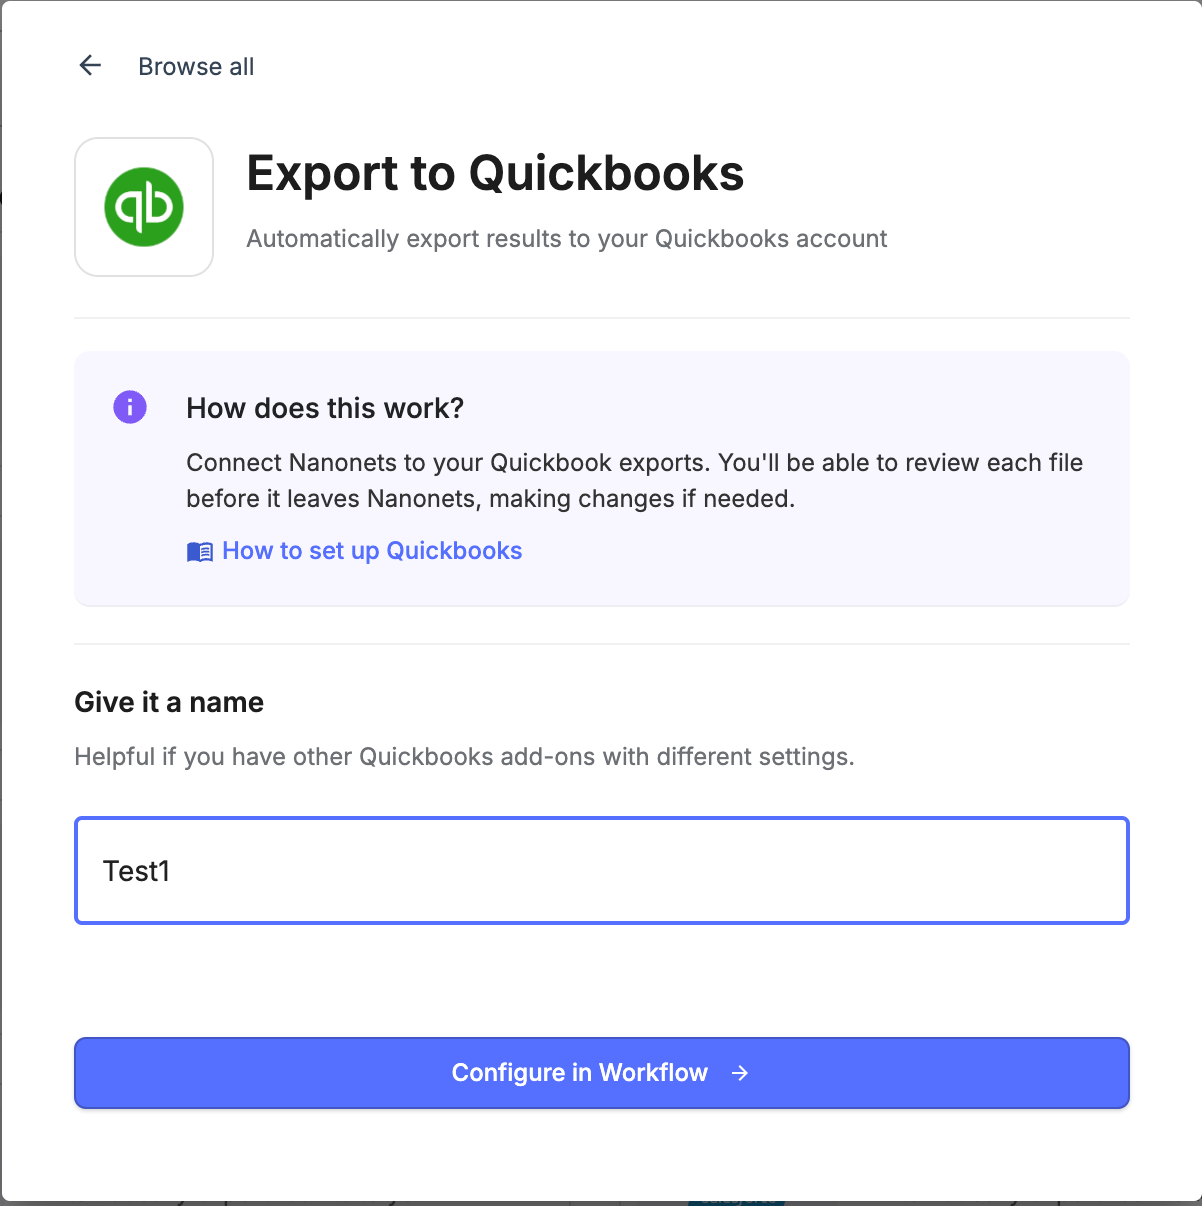
- Name your integration and click on Configure in Workflow.
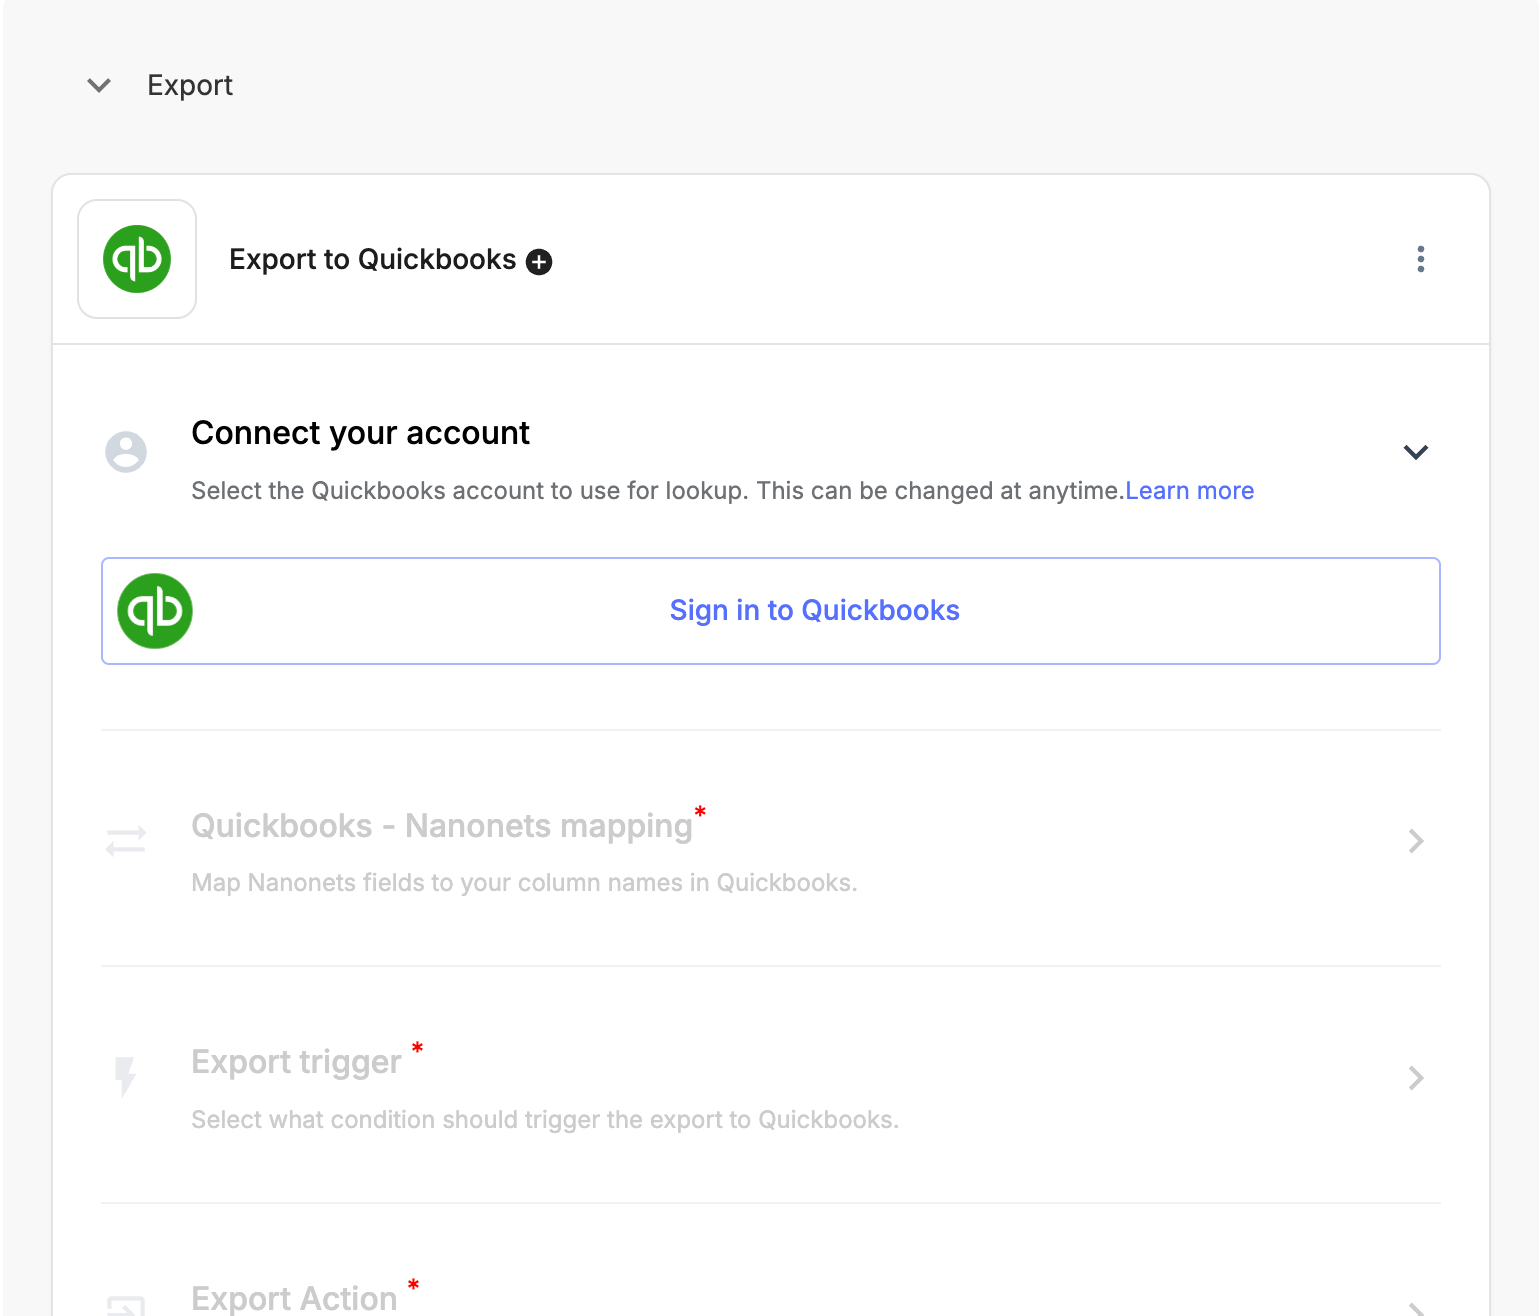
- Sign in to your Quickbooks account and follow the instructions to setup the Quickbooks integration.
- That’s it! You can now automatically export bank statements to Quickbooks without any hassle. You can similarly convert other documents from PDF to QBO such as invoices, receipts, and purchase orders.